MYZR-SSD2351-EK112烧录手册
usb接口下载
烧写模式拨码设置:1: on, 2: off 3: off 4 : off
烧写工具:UsbFactoryTool_1.0.0.19.tar.gz
镜像文件:SstarUsbImage_202503050415.bin
解压烧写工具
右击解压到当前目录,我的电脑是64bit,所以选择工具USB_Factory_Tool_64_1.0.0.19.exe
设置钣金烧写模式
烧写模式拨码设置:1: on, 2: off 3: off 4 : off
下载
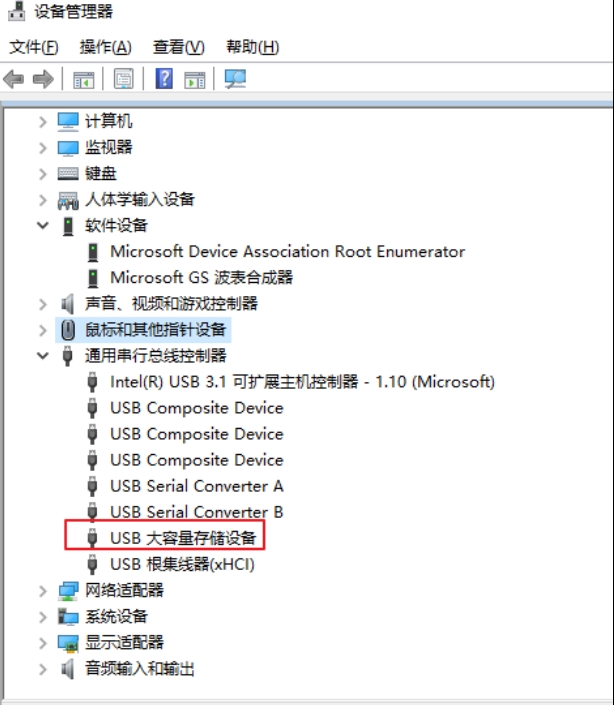
接上电源和USB线,电脑检测到”USB大容量存储设备”
双击烧录工具,USB_Factory_Tool_64_1.0.0.19.exe,如下:
可以看到检测到的设备
选择烧写的固件
点击绿色按键开始烧写
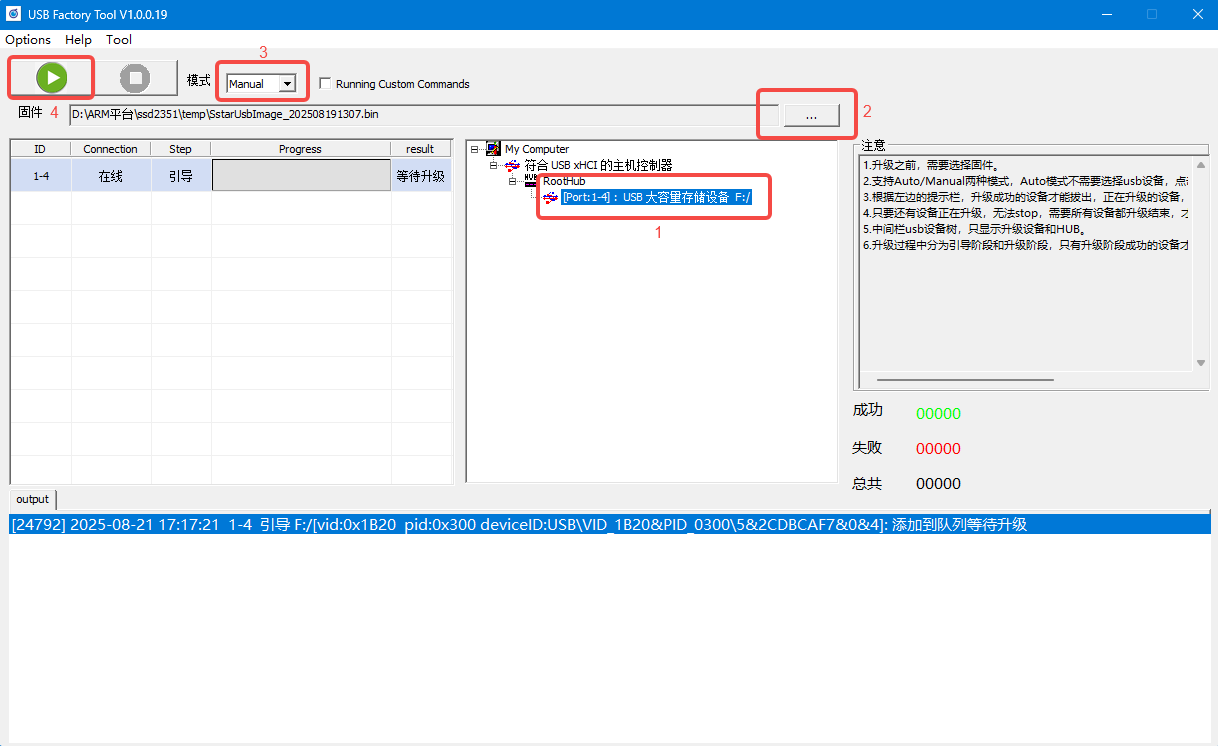
当进度100%时,点击红色停止按键结束
Flash_Tool烧录
烧写工具:FlashTool_5.0.52.tar.gz
本方式适用于空片烧录或者板子无法进入Uboot控制台的情况下使用。
如非空片或者能够正常启动的情况下,想使用Flash Tool烧录,则需要按照以下方式先关闭掉Debug Uart
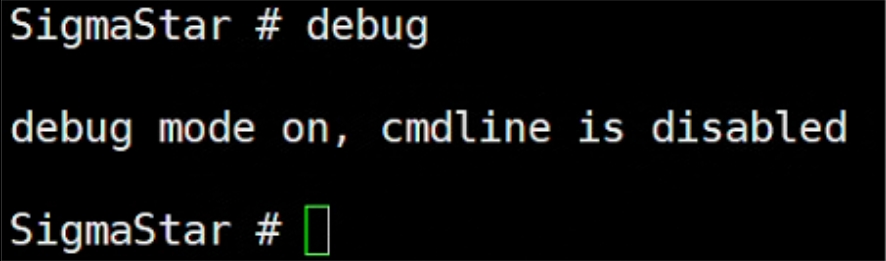
uboot控制台下直接输入`debug`,然后关闭串口终端
kernel下,则输入`11111`,然后关闭串口终端

开机,并确保串口的log无法执行到uboot控制台(如能正常启动,需要先在uboot控制台输入debug指令停掉串口调试功能)
关闭串口调试终端
启动到Uboot需要必备的分区以及分区起始地址
Nand Flash:
Binary file |
offset |
Binary 放置目录 |
|---|---|---|
cis.bin |
0x00000 |
projectimageoutputimagescis.bin |
cis.bin |
0x20000 |
projectimageoutputimagescis.bin |
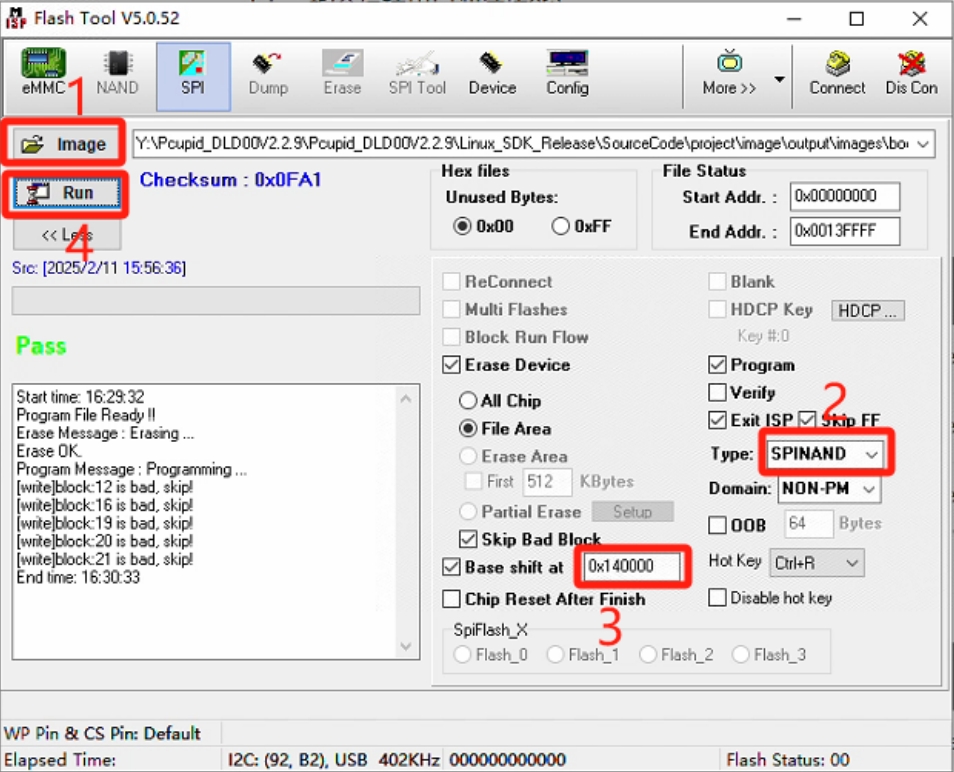
boot.bin |
0x140000 |
projectimageoutputimagesboot.bin |
烧写cis.bin镜像(0x00000和0x20000都烧写一次)

烧写boot.bin镜像
TFTP服务器烧写
#打开tftp服务器,默认编译好的镜像路径project/image/output/images,把image复制电脑,选择Browse设置路径,如下:

#板子需要进入启动模式:启动拨码模式:1: on, 2: on 3: off 4 : off
#插入TYPEC线,开机按住Enter不放进入到Uboot控制台,按照以下方式设置IP
setenv ipaddr 192.168.137.81; //设置板端ip,要求能跟PC端ping通
setenv serverip 192.168.137.99; //设置PC端的ip
setenv -f ethact sstar_emac; //设置使用Emac,本平台使用的是Emac
setenv -f ethaddr 00:11:22:33:44:55; //设定mac地址
setenv -f netmask 255.255.255.0; //设置掩码
setenv -f gatewayip 192.168.137.1; //设置网关
estart //初始化网络 uboot 下使用网络之前需要先输入该命令
estar
#烧写成功,会自动启动板子
#与全烧录的区别是此方式可以estar auto_update.txt中的脚本,烧录任意单独分区